Free Webinar: Optimizing for AI with Britney Muller & Andy Chadwick. Sign up now!


When installing Sitebulb on a MacOS machine, you’ll need to ensure that you replace the old version of the Application and update any shortcuts you have created for it.
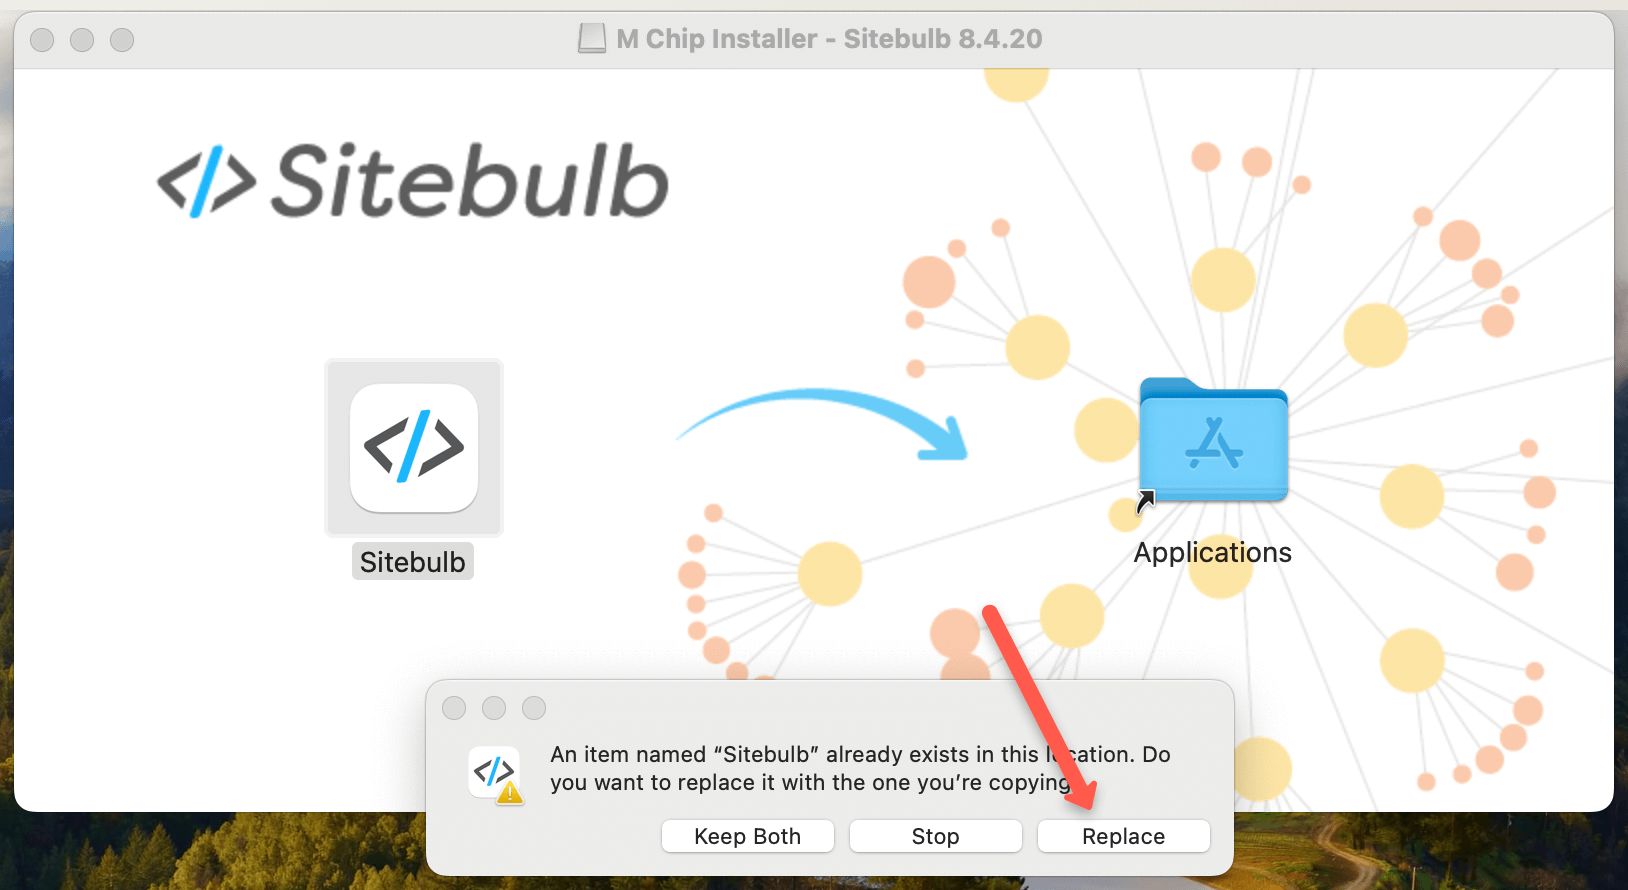
After downloading the installer, drag the Sitebulb file into your Applications folder. On the pop-up, always choose ‘Replace’ to ensure that the old instance of the application is replaced by the new version.
Restart your machine after installing it to ensure that any background processes are shut down and the new version is successfully installed.
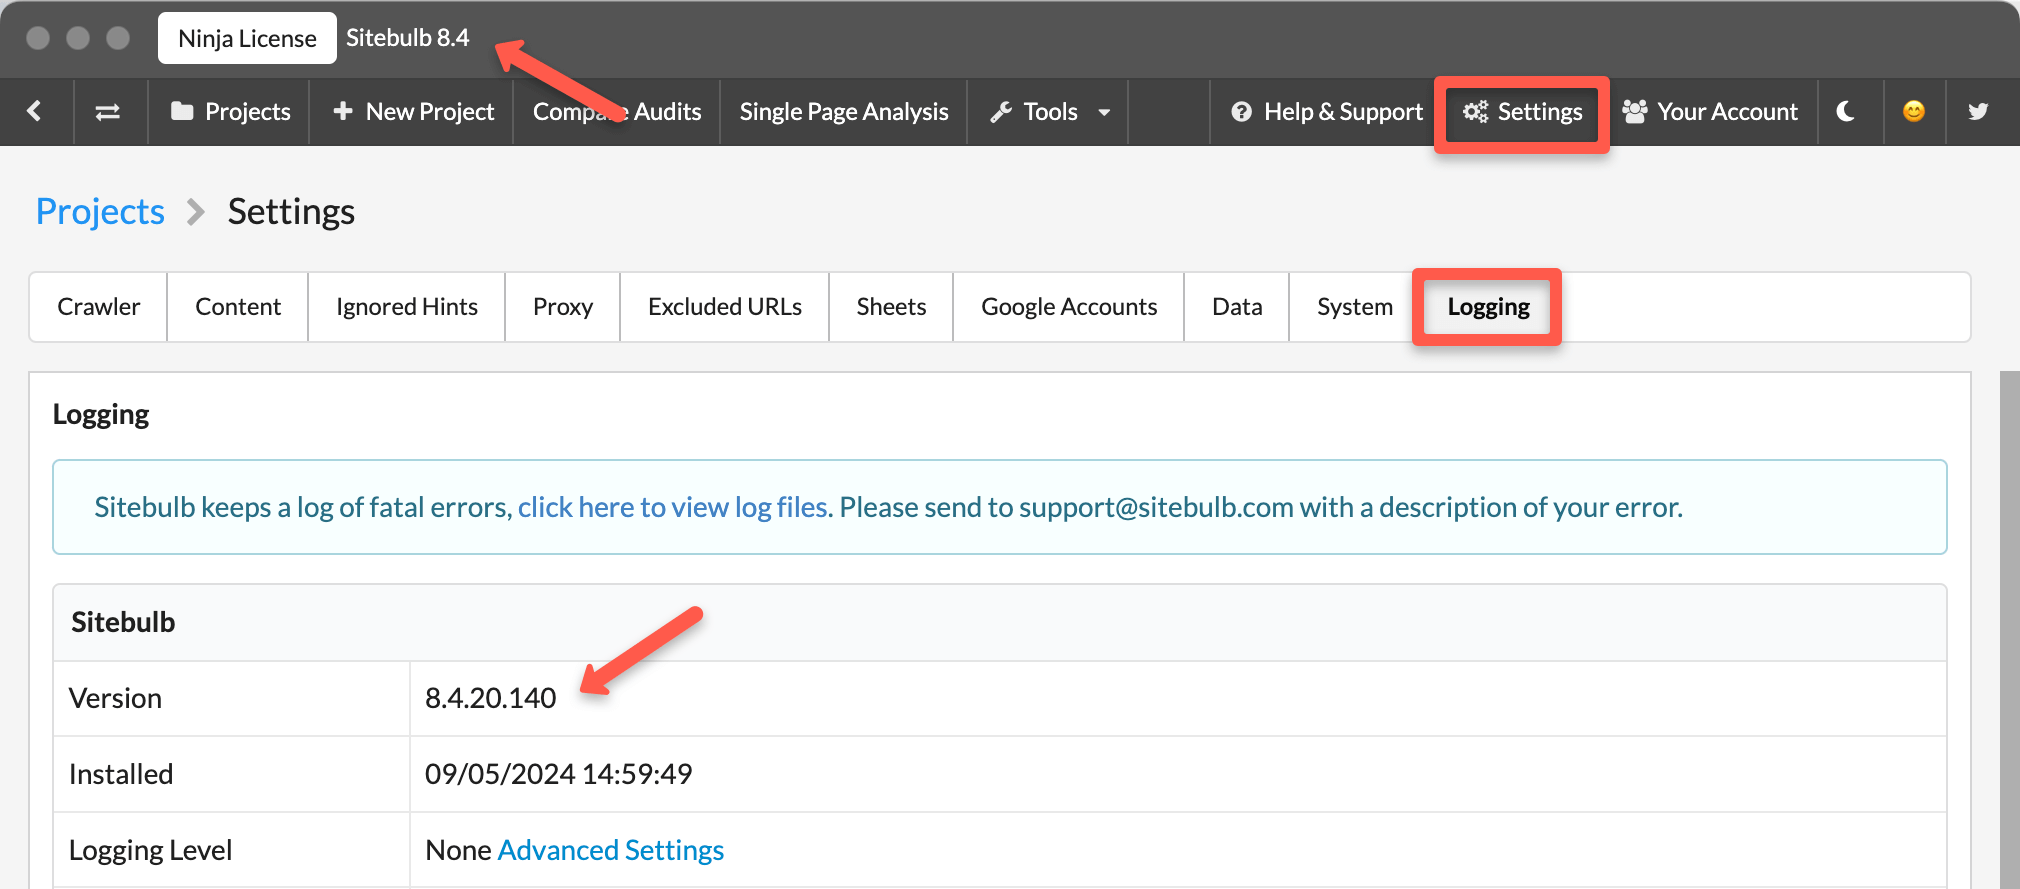
You will see the version of Sitebulb you are running in the top-left corner of your window.
You can also find this information by navigating to Settings > Logging
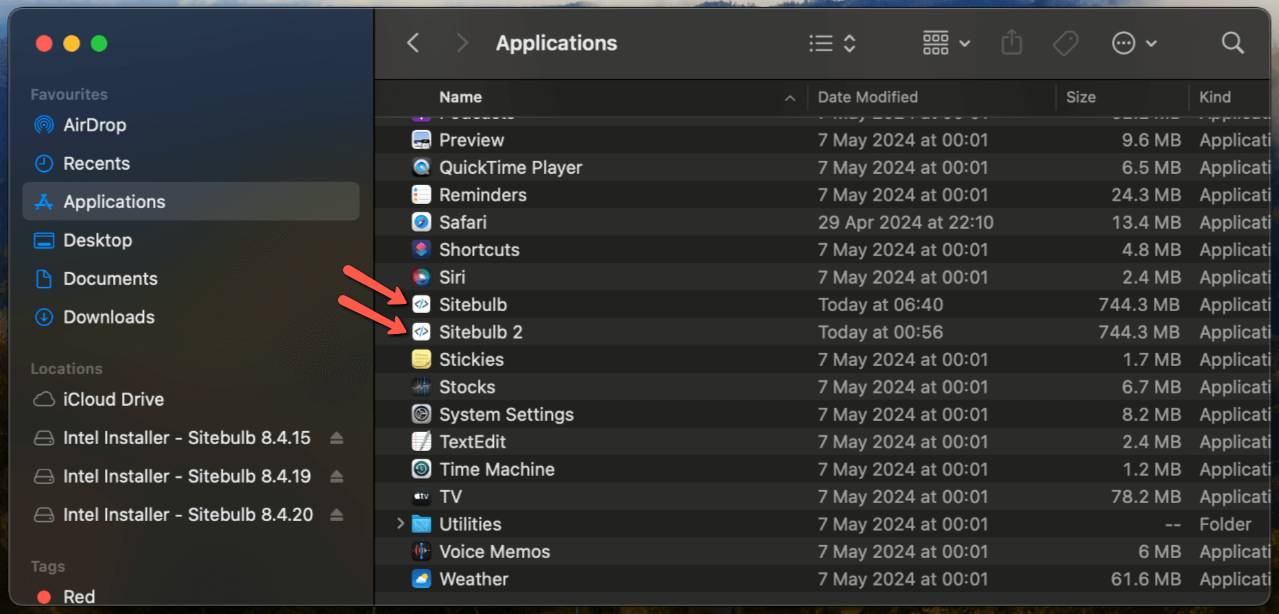
If you fail to Replace the old instance of Sitebulb, you may end up with two versions of Sitebulb installed on your machine, which could cause issues.
To check if this is the case, please navigate to Applications and look for Sitebulb.
If you do find two instances of Sitebulb, or otherwise struggling with the update follow these steps:
If you are still having trouble updating Sitebulb after following the steps above, please contact support by email or directly through the chat in the software.