Once your server is configured, any user with a Sitebulb Pro/Lite (desktop) license can connect into this server - all you need is the IP address of the server and a valid secret key.
IMPORTANT NOTE: This bit needs to be done for every user that wants to connect to the server.
Make sure you are using the latest desktop client, which you can download from here (feel free to enjoy the release notes while you wait for it to download).
Once installed, you should not need to do anything special regarding licenses - if your license was already active, this should remain active and you should be ready to go.
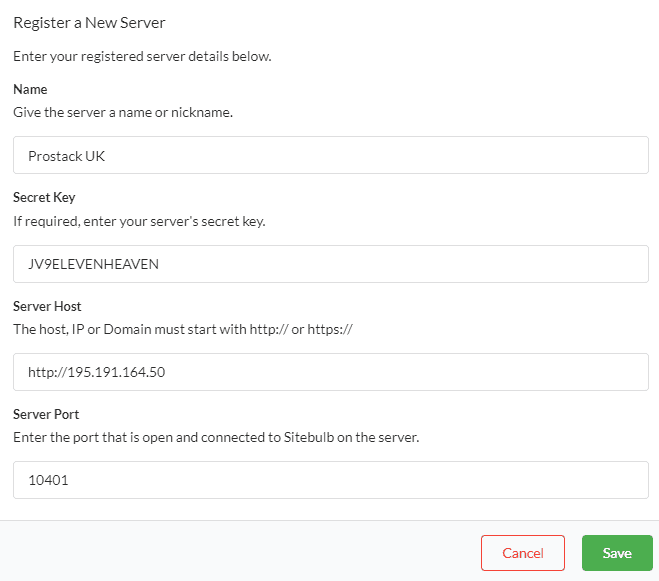
In order to connect to Sitebulb Server, you need to provide the details of the server. Start by heading to the Servers section in the top left and hit Add a new server:
You need to add the server IP address, port number and secret key:
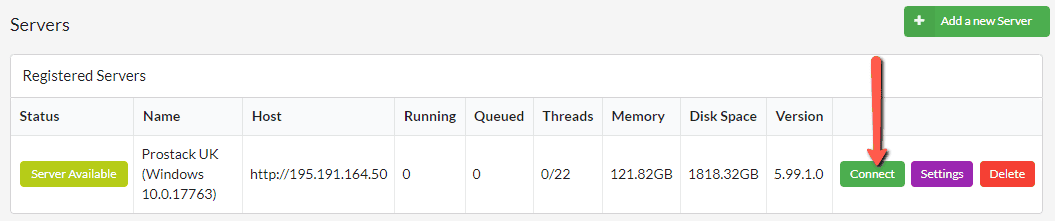
Once you hit Save this will add the server to your list of Registered Servers, and you can Connect to the server by pressing the green button:
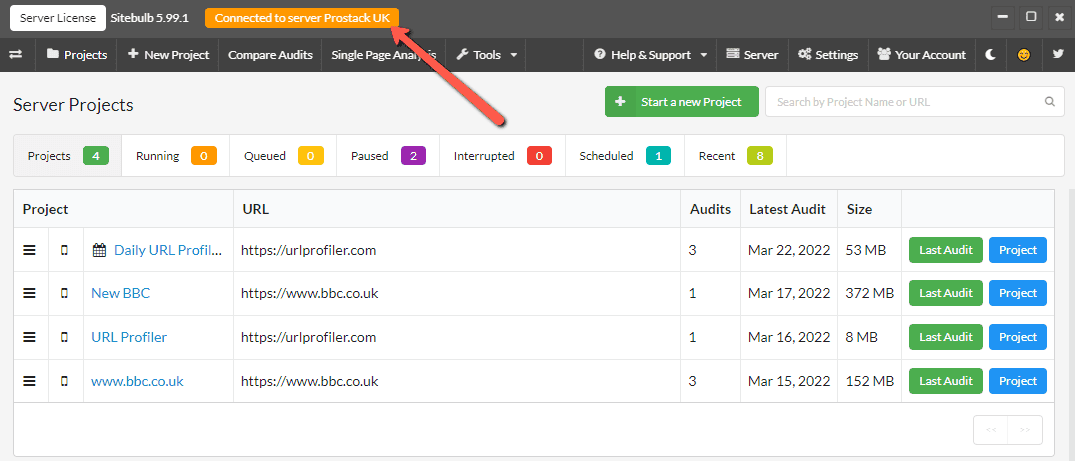
This will now switch your local version of Sitebulb so that the data you see in Sitebulb is now actually the data on the server.
You'll see a message at the top of the screen that clarifies you are now looking at audits on the server, and not on your desktop:
Now that you are looking at data on the server, you can dig into any audit on there in exactly the same way you would on your desktop machine. You can even produce CSV exports on the server and save them directly to your desktop!
If I go ahead and Start a New Project, this will set up the project and run the audit on the server. I will set up an audit to run using 5 threads.
Now, when I return to the server list, you will notice a few things have changed:

Firstly, you can see that you are now Connected to the server, with the option on the right to Disconnect. Also pay attention to the highlighted columns above:
As you use the server version, these numbers are worth paying attention to - you want to ensure that your machine is not about to run out of resources!
Once you have finished setting up audits or looking at data on the server, you can easily switch back to your desktop machine, OR, if you have multiple servers connected, you can switch between these servers:

If at this point you find you can't connect to your server, either you have entered the login details wrong, or something has gone awry in your initial server setup.
If you are experiencing issues and you are a Cloud Server customer, please reach out to us on [email protected].
If you are a DIY Server customer, it is most likely that there is a network issue in your setup that needs resolving - don't worry though, as we have troubleshooting guides that work through every step so you can isolate the issue.
Since the steps are significantly different whether you are using a rented/external server or a machine on your local network, make sure you select the right guide for you: