Sitebulb is a desktop crawler, and proud of it. However, should you wish to pair it with a VPS, or a cloud computing service like AWS, you'll have yourself a very powerful cloud crawler, at a fraction of the price of 'enterprise' crawler software.
If you've never set up an AWS instance before, this is the guide for you - I'll show you exactly how to do it, which buttons to press and which bits you can safely ignore. Any Czech readers out there, I refer you to an equivalent guide by the awesome Zdeněk Dvořák.
We're going to be setting up an EC2 instance - a virtual server in Amazon’s Elastic Compute Cloud (EC2) for running applications on the Amazon Web Services (AWS) infrastructure.
There are a number of steps, but they are all very straightforward in their own right.
Ha! Like you don't have an Amazon account already. But I suppose you might want this account to only be associated with work, so you actually may need to set up a new one. Do so here.
You're going to need to add a payment method, so add a credit card in the credit card adding area (I'm sure you can find that bit on your own).
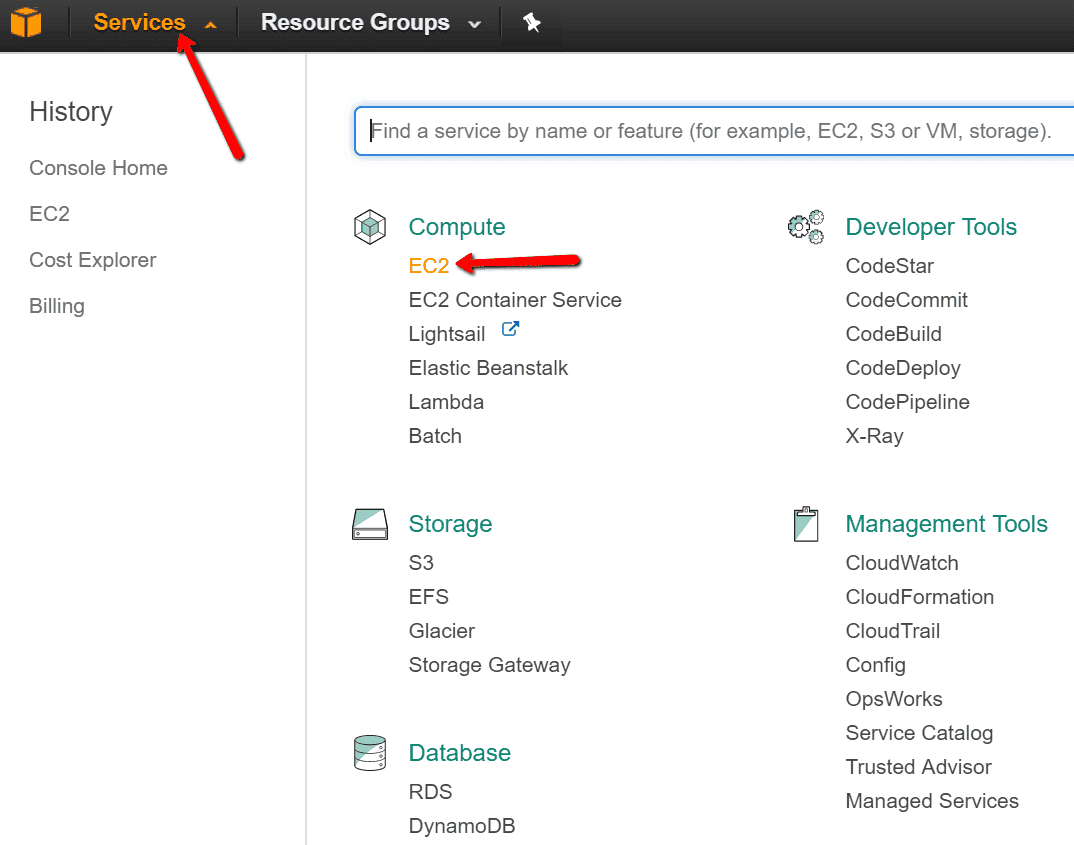
At time of writing, their main navigation has a big orange 'Services' button with a mega menu that pops out. You want the 'EC2' option.
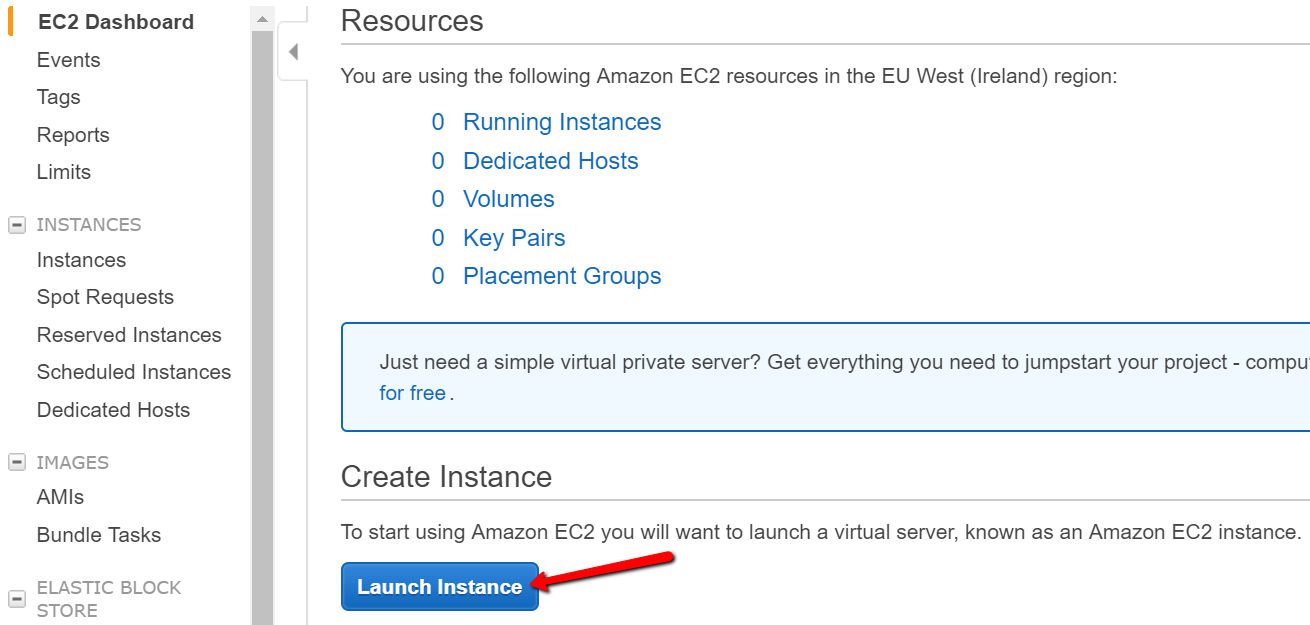
This brings you to a complicated looking page. Ignore it all, the only thing you really need to care about is pressing that big blue button Launch Instance.
That said, before you do, just double check you are setting up an instance in the region you want to be crawling from. You can see mine below is the region 'EU West (Ireland)'. If I was crawling a website based in the USA, I'd change my region to somewhere in the States. You can do this via the little dropdown in the top right, alongside your name.
Once in the correct region, proceed as before and hit that button.
Yikes! What does 'Amazon Machine Image' mean? Who cares. It's not important.
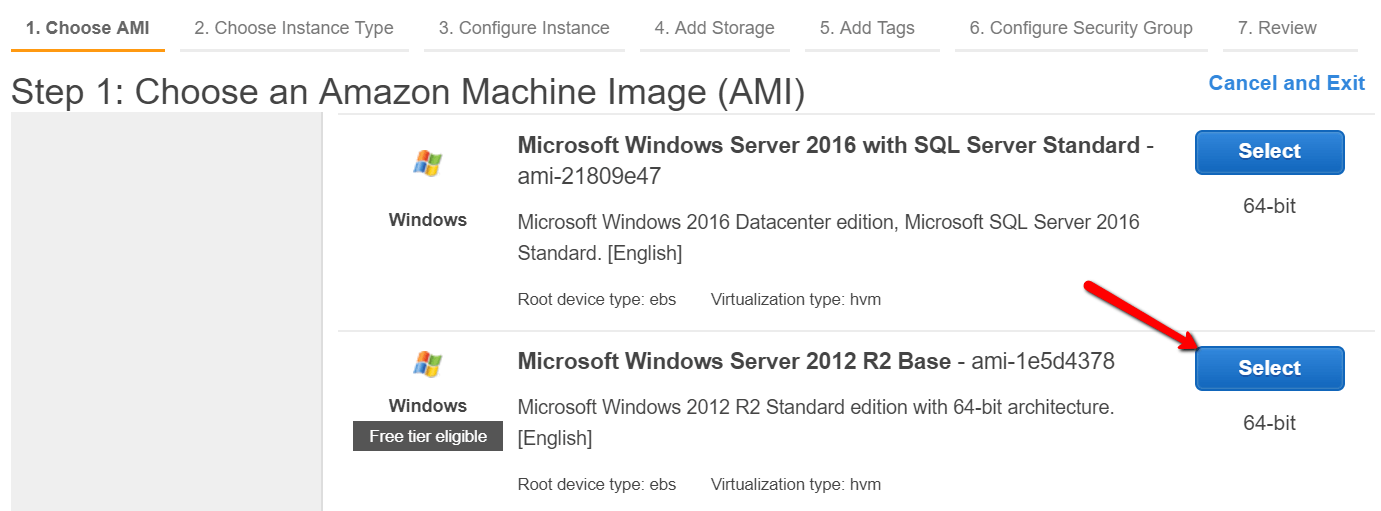
Scroll down the options until you find: 'Microsoft Windows Server 2012 R2 Base' and hit the blue Select button.
Any Windows server should be fine, just make sure it is 64-bit.
Lots of options here, and there's not a hard and fast rule for what you need, because it really depends on what you are going to be crawling - how big, how fast etc...
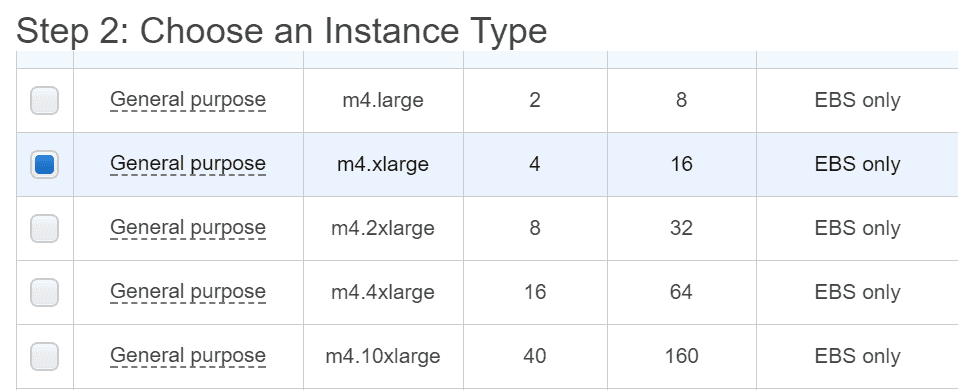
If we work under the assumption that you might want to crawl a site with 500,000 URLs, we'd recommend the 'm4.xlarge' option, which has 4 cores and 16 GB of RAM.
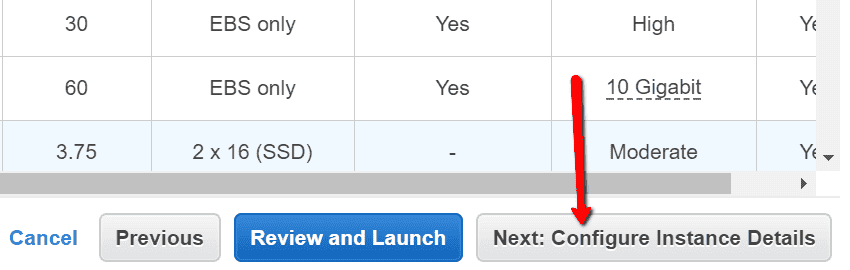
This time, we actually don't want the blue button, as we need to do a little bit of configuration, so hit the grey button Next: Configure Instance Details.
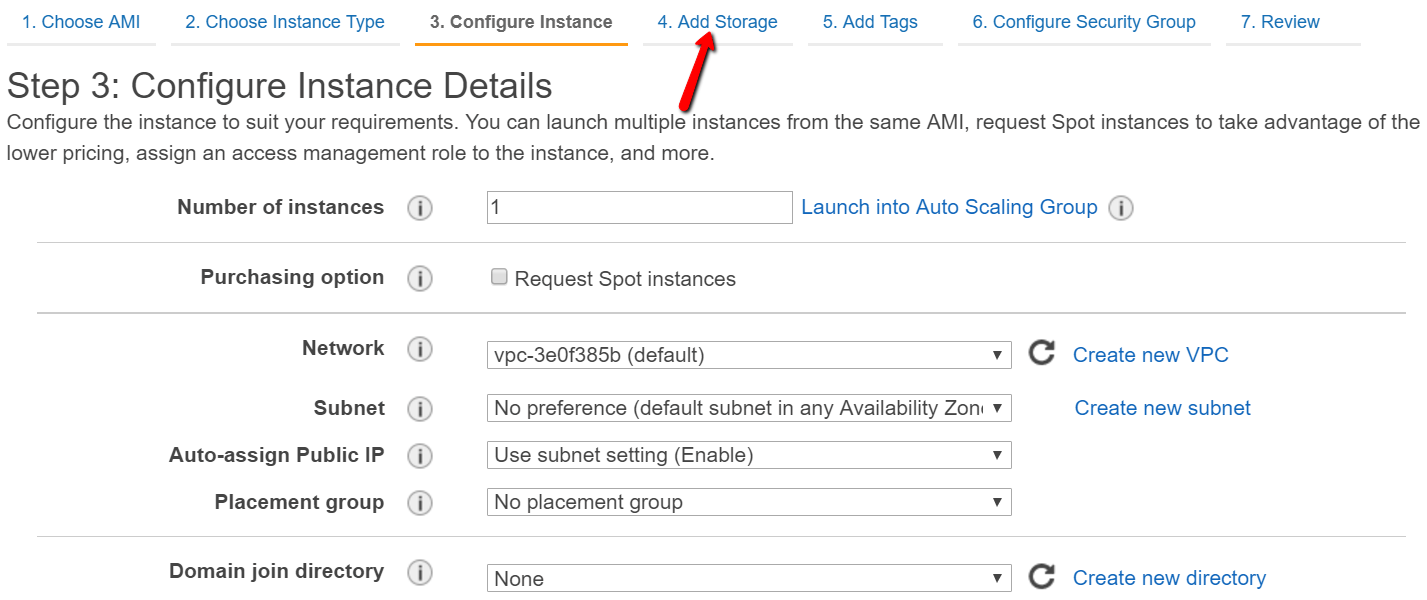
The easiest step yet, just skip to the Add Storage option.
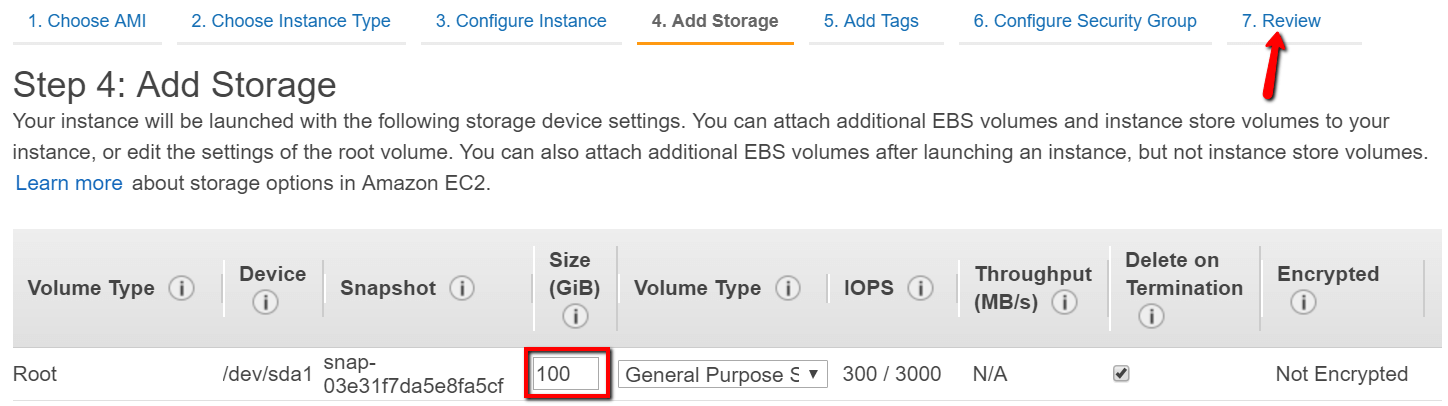
By default you'll get 30 GB data storage, which sounds like it might be plenty. However, lots of this is taken up by the OS, so you have way less than you think. If you are crawling big sites with lots of data, you can easily eat up 20 GB of data.
The safest thing to do is just increase the storage to something like 100 GB, since it barely costs anything extra.
Adjust the 'Size (GiB)' figure, then smash that blue Review and Launch button.
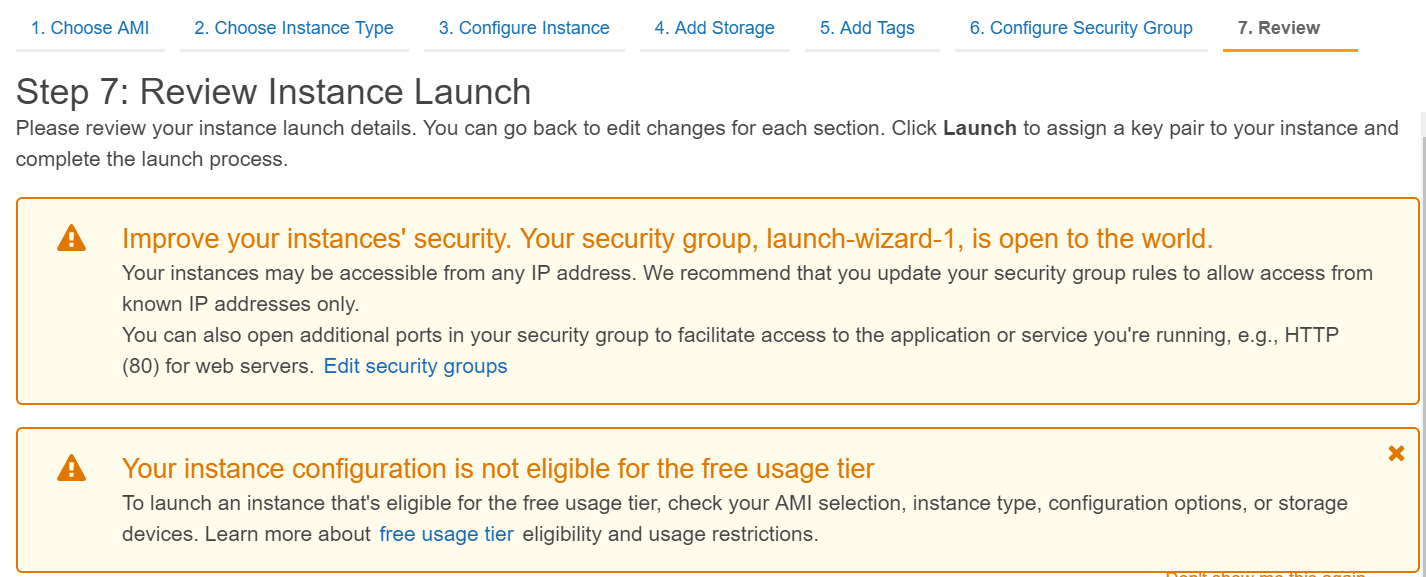
Amazon will give you a bunch of warnings. Ignore it all and slam Launch. Let's get going!
Well, not quite. You need to create a 'key pair' to connect to your instance. It's like a password, but more annoying/secure (delete as appropriate).
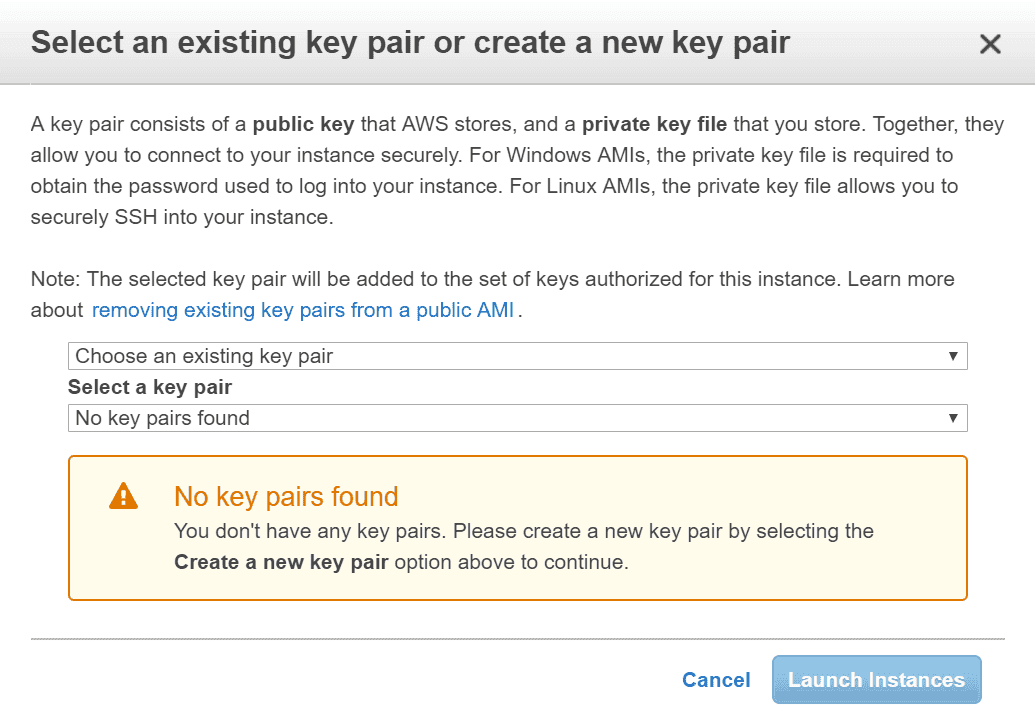
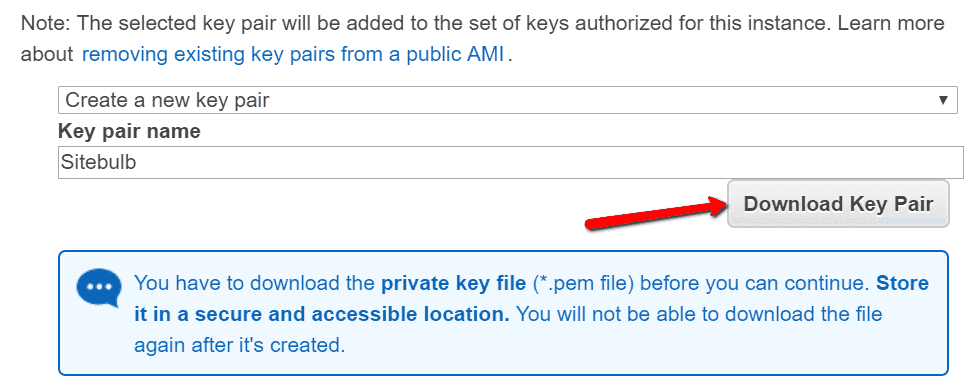
Since you won't have a key pair yet, you'll need to create one. Use the first dropdown to select 'Create a new key pair' and then name the key pair appropriately ('Sitebulb' is an awesome name for a key pair, it's been said).
Hit the grey Download Key Pair button. You'll need to download this and store it on your local computer (or Dropbox etc...).
Progress, finally! Your instance will claim to be launching while you remain on this screen. Refresh the screen in a few minutes and you'll probably be fully launched.

Once you get through to the Instances screen, you'll see that your instance is 'Initializing', so you can't do anything with it until that bit is complete.
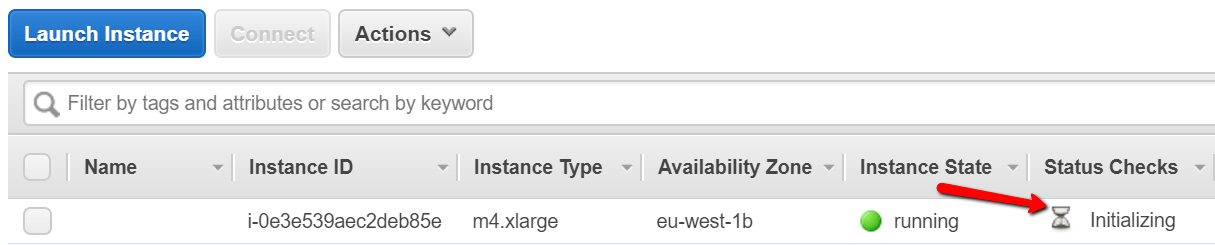
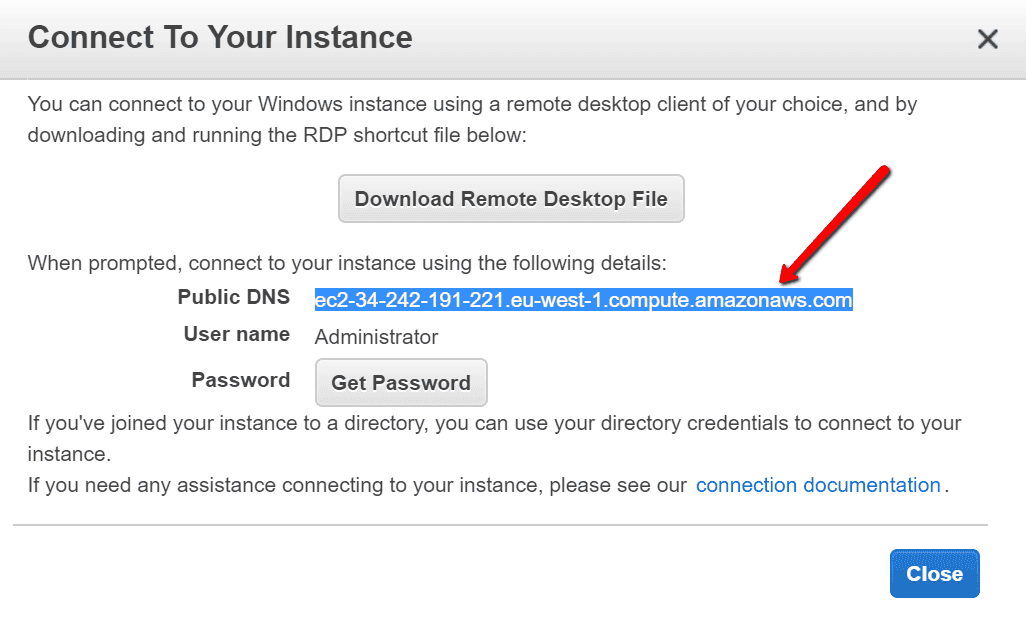
Once the 'Instance State' changes to 'Running', you can connect to the instance. Select your instance on the left, then hit the grey Connect button.

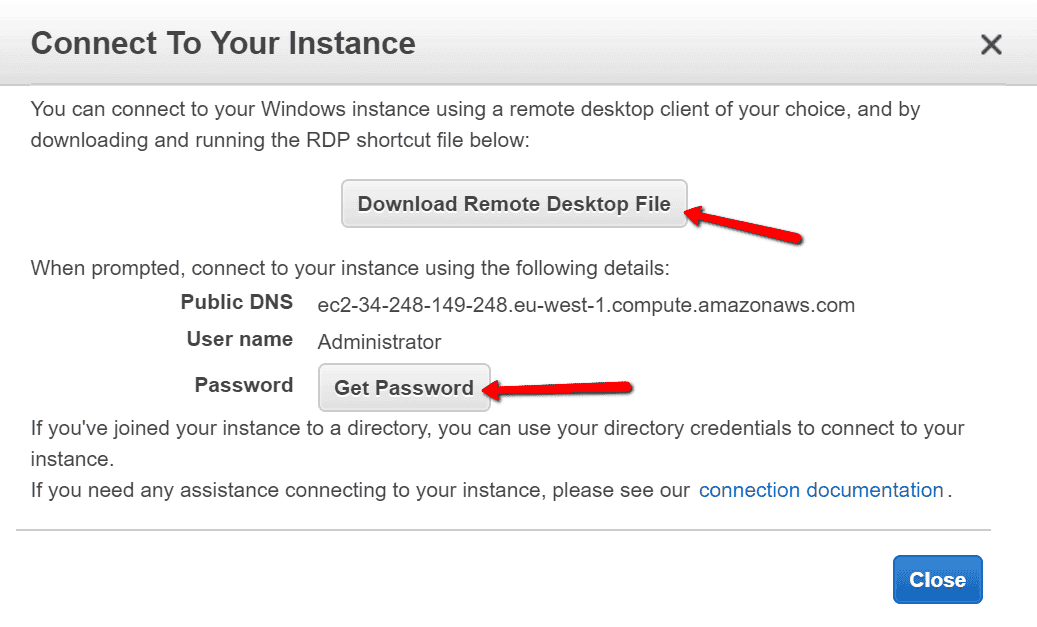
Now you'll need to download the RDP shortcut by hitting the grey button Download Remote Desktop File - this will be familiar if you've ever connected to a remote desktop before.
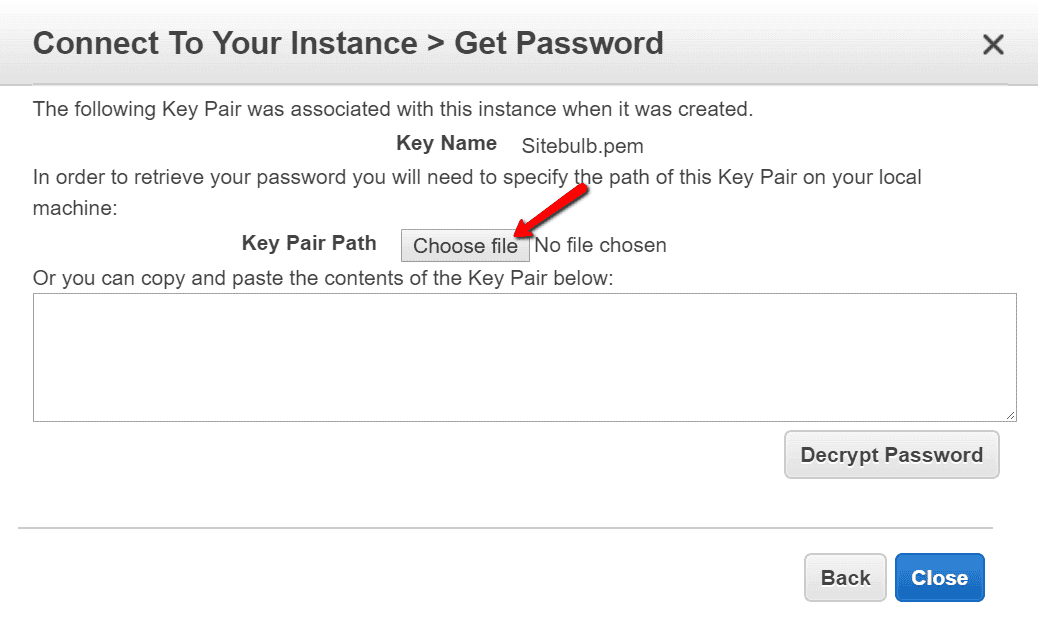
You'll also need to grab your password to connect, which is where the key pairs come in. Start by hitting the grey button Get Password.
Then you'll need to click Choose File; then go and find your key pair.
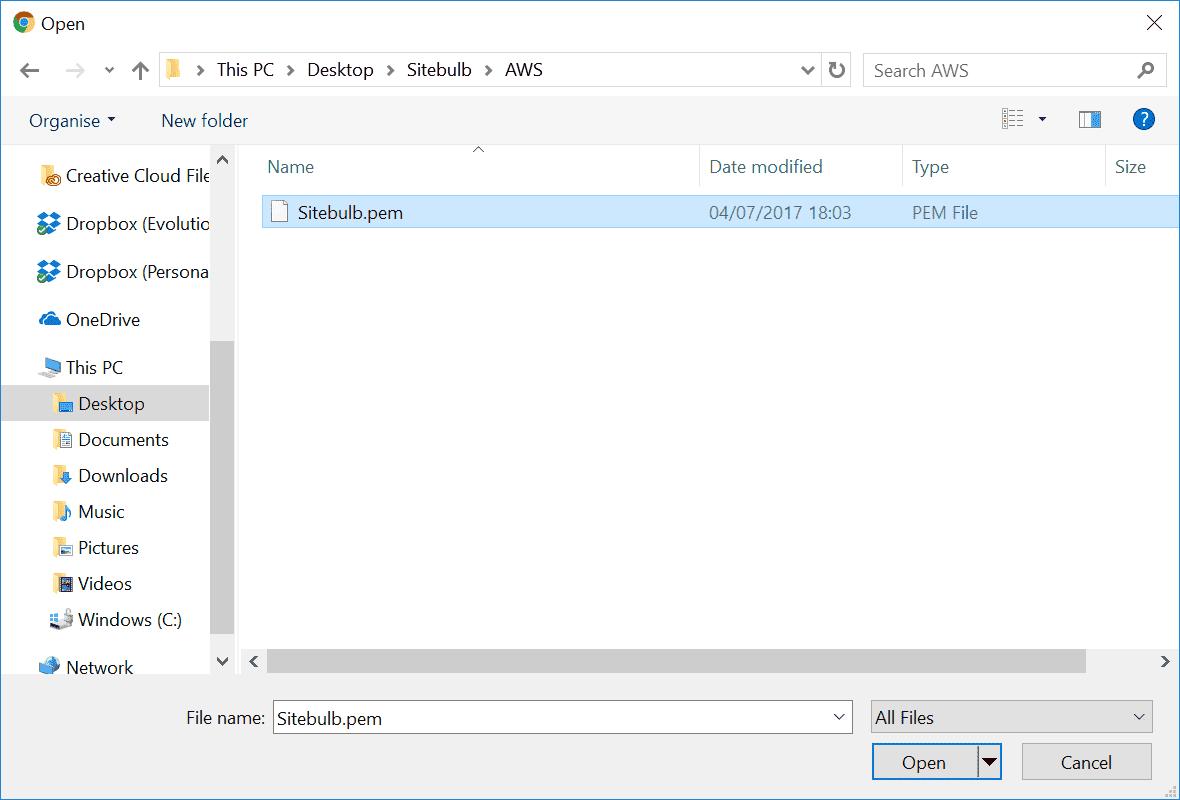
Here's where I saved mine, so I just select the Sitebulb.pem file and hit Open.
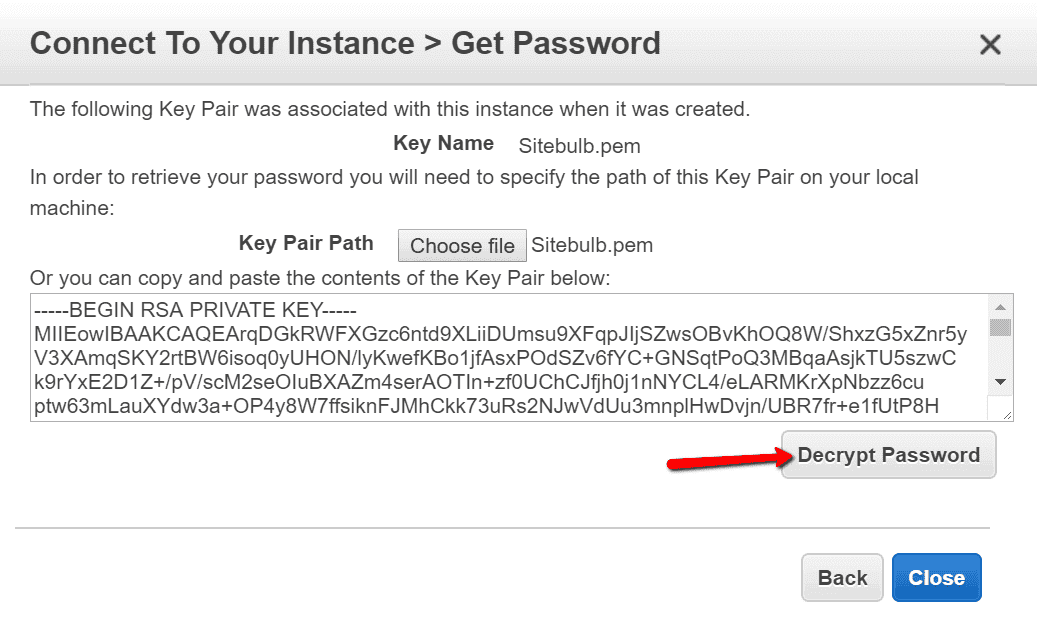
The key will display in gobbledegook, so hit Decrypt Password to see something more legible. Copy your password to the clipboard.
Everything so far is essentially operating-system-agnostic (like that is a thing), even though all the screenshots have been on Windows. But at this point it gets a little different if you're on Mac. So I've split Step #14 into two, and this is the first method, for Windows (if you're on Mac, skip to Step #14 below).
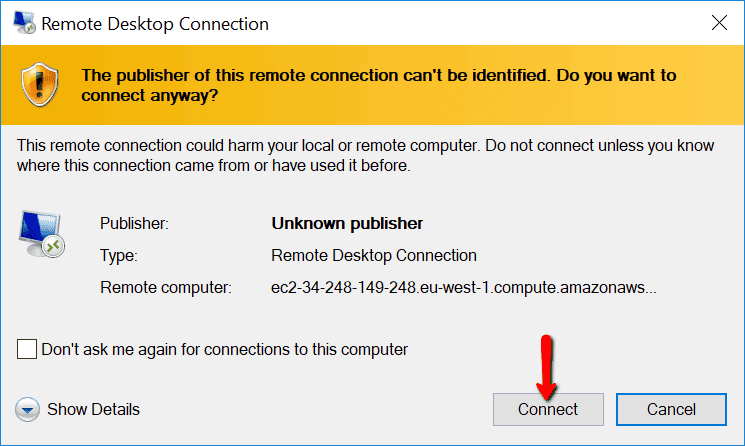
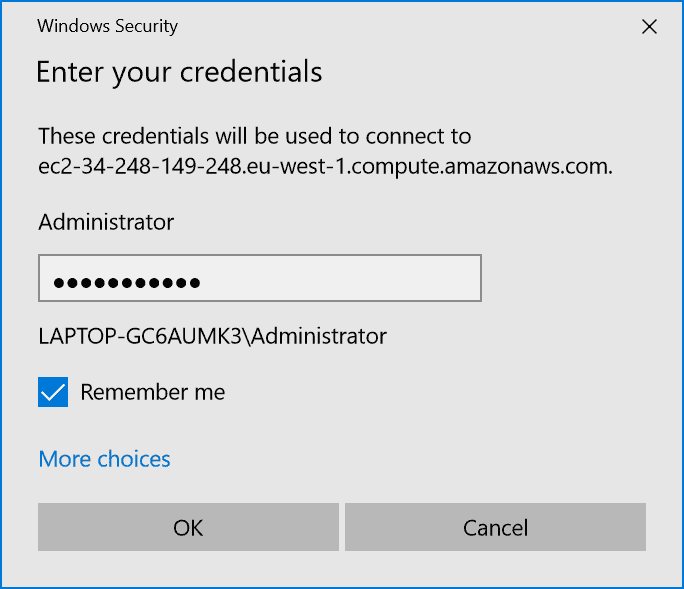
Windows has remote desktop software installed by default, so just fire up the RDP shortcut you downloaded earlier and hit Connect. You may also wish to tick 'Don't ask me again for connections to this computer', to save time next time around.
Paste in the decrypted password from your clipboard. Again, tick 'Remember me' to save time.
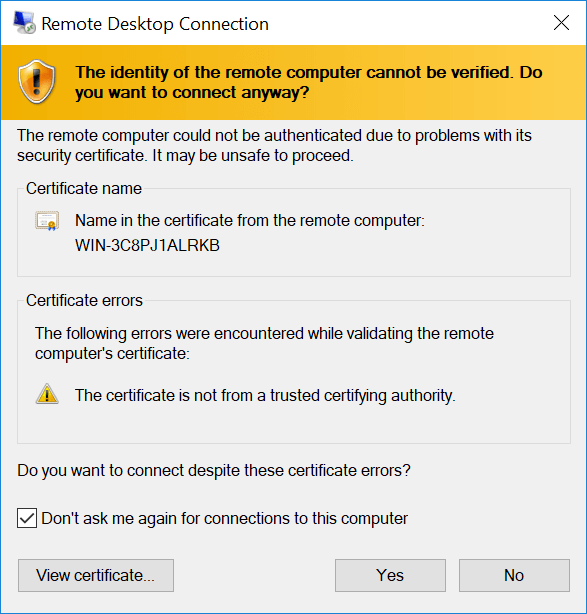
Blah blah certificate errors blah blah. Ignore all this stuff, and tick the 'Don't ask me again for connections to this computer' button again to make life easier for future you.
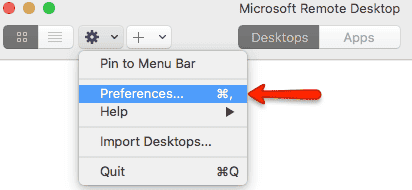
In order to connect through RDP on your Mac, you'll first need to download the Microsoft Remote Desktop app from the App Store (free).
Once that has installed, the first thing to do is go and add a user account. Click 'Preferences':
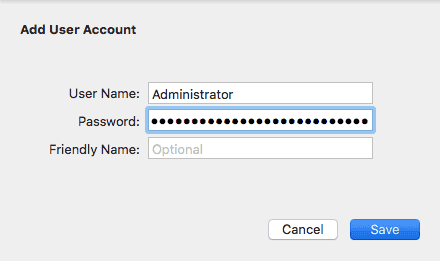
Then select the 'User Accounts' tab and hit the + button to add one. Enter the username as 'Administrator' and paste in the decrypted AWS password (which should still be saved on your clipboard).
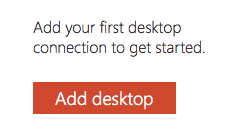
Save that and exit the Preferences area, then click the main CTA button to 'Add desktop'.
Then you'll need to briefly go back to your browser and copy the 'Public DNS' address of your AWS instance:
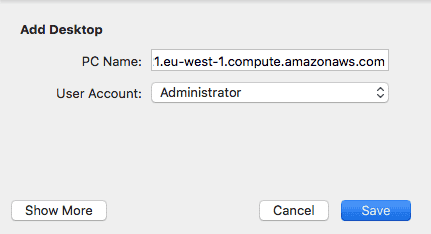
Paste this in the box marked 'PC Name', and from the 'User Account' dropdown select the 'Administrator' account you just created, and hit Save.
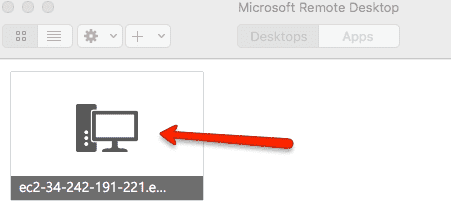
Now you'll see a little icon in the Remote Desktop client, double click this to start the connection.
You'll get a couple of annoying warnings, just click continue every time.

Then you'll be presented with what looks like a Windows desktop.
You are now (finally!) cooking with gas. It'll take a few minutes to get going, so be patient while it sets up.
While you are waiting, go and get the latest Sitebulb installer file (which you can download from here) on your (normal) local computer.
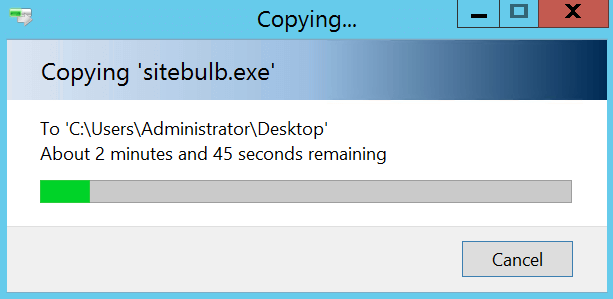
Then, copy the Sitebulb installer from your local computer, go back to the AWS server, and paste the Sitebulb installer on your desktop. From there you can install it and proceed as normal.
Your AWS instance is now set up, and you've successfully installed Sitebulb. Since you've probably set up AWS because you want to crawl a particularly large website, we'd also recommend you check out our guide on crawling large websites.
Once you know how to do it, spinning up an instance on AWS is really straightforward and pretty quick to do. However, it's not all that clear how expensive or cheap it is. AWS can be extremely cost effective, as long as you stay on top of what you're paying for.
If we revisit Step 5, the instance type I recommended was a m4.xlarge, which is about $0.40/hour, whereas the next version 'down', m4.large, is about $0.20/hour. So you're looking at about $10 and $5 respectively, to keep these babies running for a full 24 hours.
Assuming you are using the Sitebulb/AWS combo to crawl sites with millions of URLs, this works out at a much better rate than using an 'enterprise' crawler.
But it is easy for the costs to spiral out of control, if you forget to switch off your instance when you're not using it.
Once you've set your instance running, it will remain running until you Stop it. If you leave it in a 'Stopped' state, then it can be started up again with just a couple of clicks.
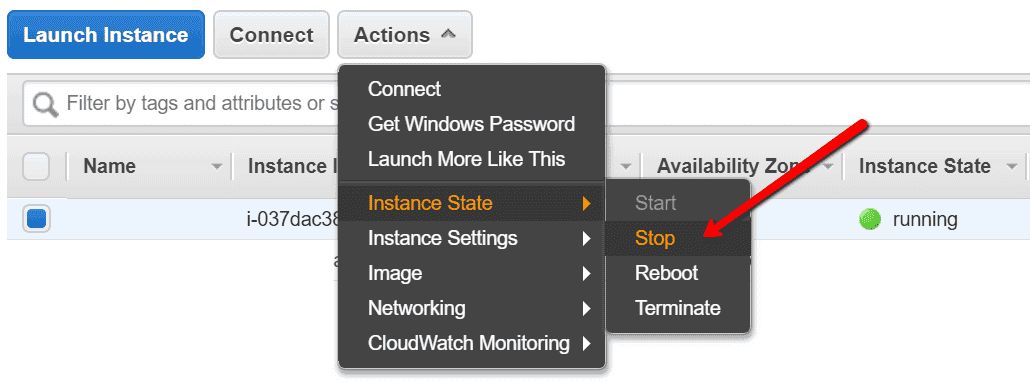
To stop an instance, from the Instances screen, select the instance you wish to stop, then go to Actions -> Instance State -> Stop.
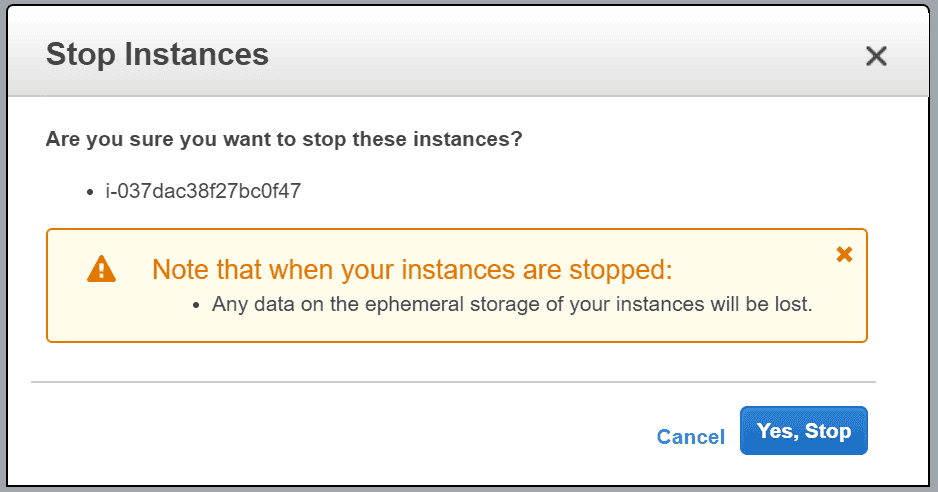
A warning message will pop up, something about 'ephemeral storage'. No one in the world actually knows what that means, so just go ahead and hit the blue button, Yes, Stop.
Now, if you leave the instance in this 'Stopped' state, you can start it back up again whenever you wish. You won't be charged the ~ $10 a day costs to keep it running, and you can start the instance back up again whenever you want, and pickup where you left off.
HOWEVER, it's not totally free to leave your instance in this state, as you are still charged for the storage. This is $0.10 per GB/month, so if you kept it at the default 30 GB, this is only $3/month, but say you pumped it up to 100 GB this becomes $10/month, sliding further away from our understanding of the word 'free.'
But starting and stopping instances like this is a convenient way to have access to a powerful cloud crawler, without the significant overheads.